
OK. Not really. It’s not what I’m supposed to get paid for. But some days, well, other projects “call” and work gets put on hold. Today, I spent the day making a magnetic weekly schedule chart for the girls.
The girls are on different soccer teams, which means games different nights of the week and varying from week to week. And Hannah is constantly asking me "How many more days until my soccer game, Mom?" It's actually sometimes annoying. LOL!
And now that both are in school, I get all kinds of confused about which kid has which “special” class every day (art, music, computers, library & gym). I have to know because on gym days, they need to wear sneakers, and on library days, they need to return their books. And of course, they don’t have these classes on the same day.
AND, just to f*ck with my mind a little more, they also have these classes on a rotating 5-day schedule. That means that as long as they have 5 days of school in a week, we’re golden, and nothing changes from one week to the next. But throw in an in-service or snow day and all hell breaks loose. Why, you ask? Because then when they do go to school that next day, they have the special class that should’ve been the day before and all of the classes shift again. See why I get confused? LOL!
So the bottom line is that I needed some sort of weekly planner type thing that could be changed when necessary without crossing things off on a calendar and creating a big old mess. Enter a cookie tray, some paint, some digital scrapbooking supplies and some peel-and-stick magnets. Put them all together and you’ve got yourself a magnetic weekly schedule planner. Sweet!
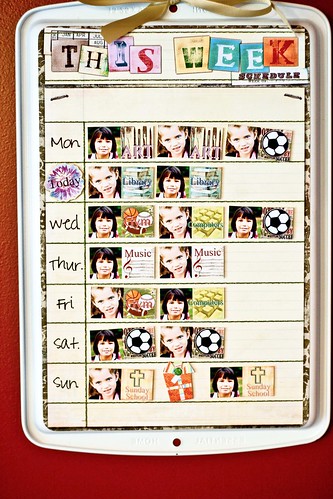
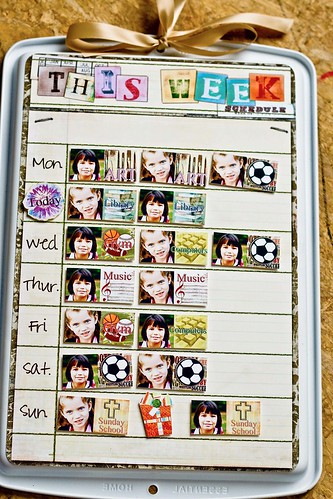
This was actually really easy to make. All I did was paint a cookie tray on the bottom. Then I opened up my digital scrapbooking supplies and created the actual weekly “calendar” and the “This Week” header. Those are just printed out on regular matte photo paper and stuck onto the bottom of the cookie sheet.
Next, I created the actual magnets.
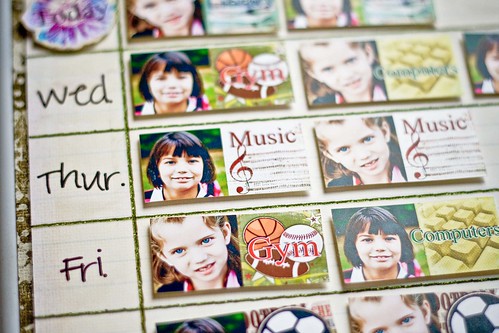
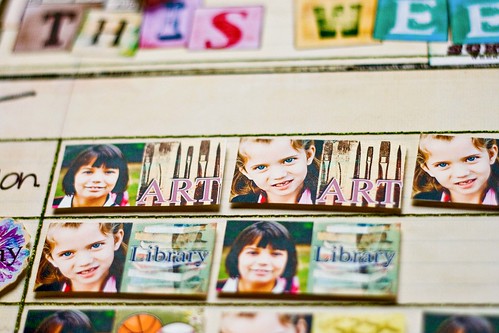
I opted to put a photo of each girl on them, mostly because Hannah can’t read yet and I think they’ll get a kick out of it. I also choose to make the picture under each word relate to the event, again, because Hannah can't read. So there are paint brushes for art days, a stack of books for library days, a soccer ball for soccer game days, etc.
For those, I just printed them out on regular satin photo paper, cut them apart, and used a peel-and-stick magnet on the back of each one.
I also created a magnet that says "Today" so Hannah would know each day what's going on for her.
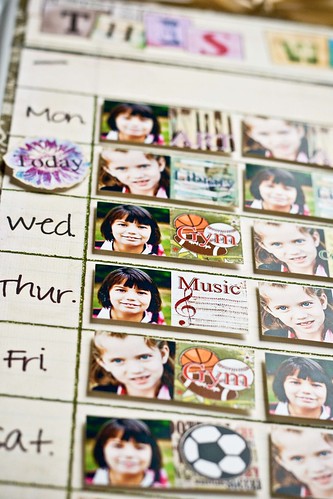
I also created little magnets for other "special events". If you look in one of the top two photos, you'll see a present between the two girls on Sunday. That's because Hannah has a birthday party that day. I also made a tree for Christmas, a bat for Halloween, an "It's Your Birthday!" magnet for, duh, their birthdays, etc.
The best part is that any magnets I don't happen to be using one week can just be stuck on the other side of the cookie tray, out of sight and ready whenever you need them (because otherwise, I assure you, I'd lose them).
So that was it. I figure each Sunday night, the girls can move their magnets around as necessary and they'll know exactly what's going on for the week. :)
Edit: I'm going to make this whole project into templates so those of you with a photo editing program can make your own. We'll offer it up (for free) on Jen Wilson's blog or on her site. I'll post here when we have it up and you can download it and make your own. :)


14 comments:
That is so cool. Great idea and very cute too.
I am totally stealing this idea. I've been kicking around various clendar ideas and this is the best I've seen. We've been having similar problems with the whole "what to do on what day" thing.
How did you affix the paper with the calendar printout to the coookie tray? did you decoupage over it to make it smooth or just leave it with the paper loose? Is there a specific kind of paint you used so it would stick to metal?
September, I just used spray adhesive to stick the calendar to the cookie tray. I WAS going to decoupage over it, but I opted not too. I didn't want it uneven, and the truth is, that since all those magnets are on it every week, that paper's not going anywhere. LOL! Even normal scrapbooking tape would work.
As for the paint, I just used a regular can of spray paint that Steve kindly picked up for me at the hardware store. LOL! The truth is that it took me like 3 or 4 coats because if you scratched the paint, it would come off. It probably still would, but I got sick of painting it, so I just left it at the 3 coats. LOL! I probably should've either lightly sanded the cookie tray or bought special metal paint.
That is so cool. Great job!
LOVE this idea. At the kids school they rotate things on a 10 day schedule and i'm always asking daynah when is gym day....i might have to look into making one of these for our house :)
Stunning! Love the idea and your finished product is just unreal. I hope they pay you good ;o)
I love this! Awesome project.
this is awesome!
i wish there were a tray that were big enough for all my kids and their activities!
Great Idea!!!!
Yeah. You kick ass. All crafty and shit.
:)
Super cute Allison, you should sell these to anyone who doesn't just steal the idea from you!!!
That turned out super cute!!
I saw a different cookie sheet project somewhere, but yours turned out even cuter! love it :-)
Look at you being all crafty! That rocks!
Dude, I'm trying to follow you but there's no "follow me" on your following thingy, and I'm technically inept! WAH!
Post a Comment